Tuesday, 31 March 2015

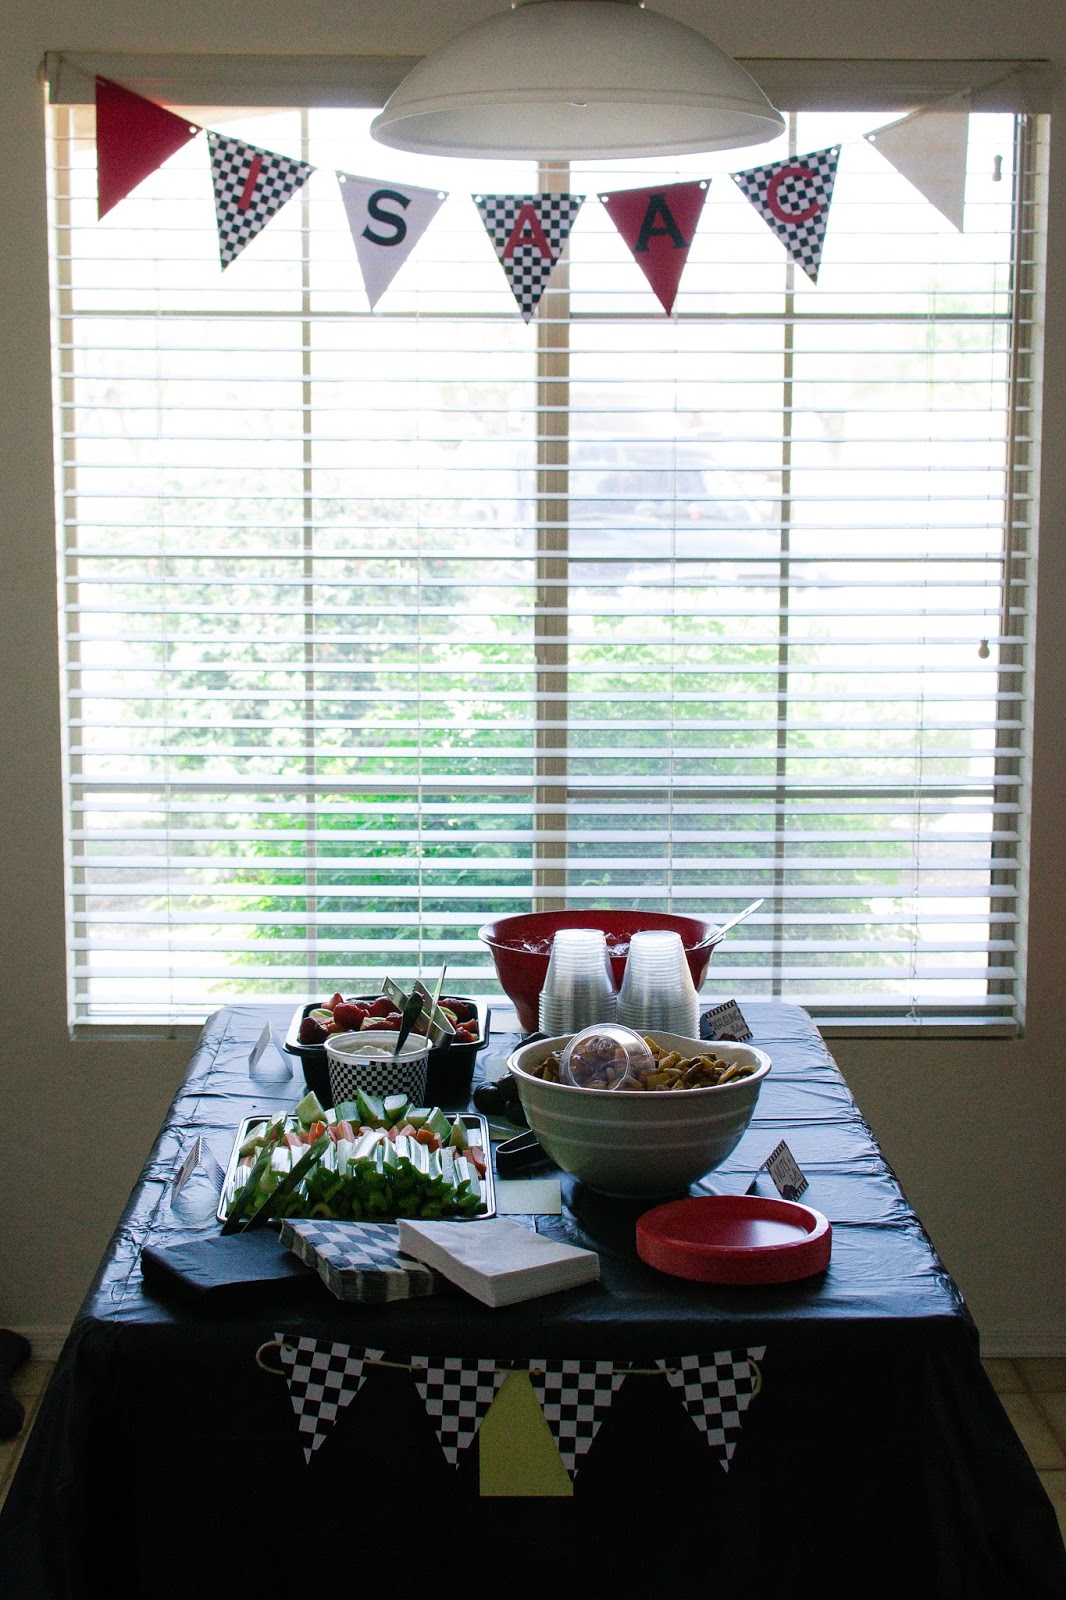
Car Themed 1st Birthday Party

Birthday parties don't come around too often at our house.  We always do something small with the family, but usually I barely even decorate for those.  So, when I have the opportunity to decorate for a "real" party, I get so excited!  I get to add decorator, baker, caterer, and designer to the usual hats that all moms wear on an everyday bases.  Thank goodness it's only for a little while, because I'm busy enough!  I sure love it though.  

My son recently just turned one, and I'm pretty sure this party was more for me then it was for him.  What one year old actually cares about decorations?  Am I right?  Regardless, I love how everything turned out, and I wanted to share it with you!


You can't have a party without cute labeled food!  Ok, maybe not, but it sure adds a cute little touch.


Now, before you look at this next picture, I need to add a little disclaimer: I am NOT a baker.  I like to pretend sometimes, but usually my creations look better in my head then when I actually try to execute them.  That being said, here is the car smash cake that I made.  For some reason the buttercream frosting separated, and I didn't have time/the ingredients to make it again.  So, I had to use what I had.  Lamo-o...  Anyway, here is the completed car.  Honestly, I think it looks like one of those "Pinterest Fail" photos.   I almost cry laugh every time I look at the one I attempted.  Oh well.  You can't win 'em all, right? 

(If anyone has an amazing fool proof buttercream frosting recipe, please send it my way)


Here's what I was going for... 


For some reason, it is absolutely impossible to find checkered paper!  I don't know why I had such a difficult time, but not a single store had anything even remotely checkered.  What's a girl to do?!  I ended up just finding a checkered background and printed my own paper :).  These flags were made with toothpicks and the folded over paper.  Super easy, and much cheaper then buying them from a specialty party store.


This kid had no problem digging into his cake.  I sure love him to pieces!
(Please be careful when putting a Bumbo on a chair like this!  They are not very stable, so please stay close to your kiddos while they sit in them!)


The table cloth was super easy!  All it was was a black $0.97 table cloth, which I then taped yellow paper to to make it look like a road.  You could use yellow duct tape too!


This was my favorite decoration!  It was fun to see the month to month growth progression.


I don't know when my next party will be, but I'm already looking forward to planning it!


Thanks for stopping by!


(You can find this invite or request your own custom design at Puddle Design on Etsy)

Friday, 6 February 2015

All You Need is Love


Whether Valentine's Day is your favorite holiday, or you would rather refer to it as "Single Awareness Day", there is one thing that is true for everyone: All you need is love!  Can you imagine what the world would be like if we just simply loved each other? 

You can love your spouse, your parents, your kids, your friends, or your dog, but I believe that it is important to love someone and receive love from someone.  Now, I'm not talking about lust, or sex, or whatever else some people try to replace with love.  I'm talking about the true love that you would walk through fire for.  Love that no simple one night stand can create.

I admit, I am a hopeless romantic, and I may or may not have had a crush on a couple of fictional men (Mr. Darcy *sigh*).  I also believe and know that love is real!  I feel it everyday when my husband looks at me and simply smiles his special gorgeous smile.  I feel it as I play with my children, as I read them stories, as I change their diapers (I do not love this task, but I do it because I love them.)  Love is not easy!  As with anything worth having in life you have to work for it.  You have to fight for it!  But believe me, it is worth the fight.

Anyway, that's my quick two cents.  Enjoy the free printable.  And Happy Valentines Day!

You can find this printable in both 5x7 and 8x10 sizes here.

Thanks for stopping by!


Thursday, 1 January 2015

December

The year has come to an end!!  I can't believe that I made it. 

 Here is the final card to finish up my resolution.  What kind of resolution should I make next year...

My brother is a bow tie lover!  Not all guys can pull off wearing a bow tie, but he is one of the few that can!  I made the bow tie from some scraps of paper, and the "happy birthday" is made of beads and wire.  I love how simple this card is.  Simple, but nice.


I hope you had a wonderful Christmas, and a very happy New Year!


Thursday, 11 December 2014

November

I was able to visit my family in Utah in November!  Of course it was awesome, but I forgot about my crafting resolution until we were just about to leave.  So, I quickly grabbed a couple cards, some paper, and some stickers, and away we went.  I needed to make 2 cards while we were there, with very limited supplies.  Here's what I came up with:

 It's amazing what you can put together with stickers, paper, glue and scissors.  No fancy stuff needed!


  My nephew is a Minion addict!  So, I knew that I needed to make a Minion card for him.  I think this Minion's name is Bob, or is it Dave?  I have no idea, but my nephew sure did! 
(All shapes completely cut by hand.)


Now, on to December cards!  I only have one birthday card to make in December, so I am pretty much done!  


October

Oh boy, I am so behind.  I am finally getting around to posting October's cards.  Christmas card season is in full swing, so I have been pretty busy lately!

In October I only had a couple of cards to make.  I can't believe that I am almost done with my crafting resolution.  I think I am going to continue making as many cards as I can, but I'll only post the awesome ones.  Hopefully lots of them are awesome...

I would love to see some of the wonderfully creative cards that you have made!  Send me a picture and I'll make sure I post it for others to see too!

 Sometime my creative juices aren't exactly flowing, so I just have to use some fun stickers I have on hand.  I think it still turned out cute!

I don't have a fancy cutting machine, so I had to trace this unicorn and cut it out by hand.  It just proves that you don't need fancy equipment to get the job done!

Oh, and here is the inside of the card.  My daughter really wanted to make a card like mommy, so I had her decorate a piece of card stock, and I put it inside.  This card was for one of her favorite cousins, so it worked out great!


Only 2 months left!  Woah!  Where did the year go?!  


Tuesday, 21 October 2014

September

Another slow birthday month in our family.  Just one, sad lonely card.

Sometimes all you need is a simple girly card.

I can't believe that there are only three months left until I complete my New Years Resolution.  Where has the year gone!?


Friday, 17 October 2014

Halloween Printables


Happy Halloween!!

This has got to be one of my favorite times of the year.  Probably because it finally dips below 85 degrees here in Arizona.  That, and my kids get free candy (which I get to eat too!)

I wanted to celebrate by giving away these Halloween printables.  You can print one, print two, or print all of them if you want!  It is my Halloween gift to you!  No tricks here!  Just treats!

Find both the 4x6 and 5x7 size files here.
(Just click on the link and it will take you to Google Drive.  Select the file for the size you want, and download each design.  If you need help, just send me a message and I'd be happy to help!)


Happy Halloween!!!!!!!


Thursday, 2 October 2014

Getting baby poop out of clothes

Today I am going to talk about poop.  It's not a subject that most people want to discuss (or even think about), but when you have both a baby and a potty training daughter, stinky poo-poo is mentioned many times a day.  Some days I feel like I'm up to my eyeballs in the stuff.  Yummy...

Inevitability there is always a onesie to be washed, or soaked, or scrubbed, or burned...  Sometimes, no matter what witchcraft I would use to remove the poop from the stained outfit, the stain still would not come out!  Talk about frustration!   Until one day, I learned the secret to poop stain removal.  And it is free!!!  Ready for it?

The sun.  That's right, the big bright thing up in the sky.

It really is that simple.


Here's what I do to get that pesky poop out:

1.  Rinse out as much as you can using cold water.  (Or, if you live in Arizona use the coldest water that comes from your tap, which is almost hot enough to shower in.)

2.  Spot the stain using your favorite spot remover (ie: Shout, OxyClean, etc.)

3.  Wash as normal.

4.  This is the step where the magic happens.  Instead of drying in the dryer, hang the stained clothes out in the sun to dry.  Make sure the stain is exposed to the direct rays of the sun.

5.   Once dry, look it over.  Poof!  The stain is gone!  Pure magic.


Oh!  That horrible stain!!!!!  (And fresh poop...)


This is what it looked like right out of the washing machine.  The stain is still a stain.


    After being dried in the sun for a few hours.  Stain gone!


I was curious if this trick would also work for dried and set in stains.  So, I took a stained outfit that had previously been washed and dried like normal.  I threw it in the wash again, but this time let it dry in the sun.  After it had dried outside for a few hours, I was surprised to see that the stain was mostly gone!  I think that you can only notice a slight discoloration if you look really, really close.

 Here is the onesie washed and dried like normal.  Notice the gross yellow stain?


After drying in the sun.  Where did that pesky stain go?


This tip has changed my life!!  Or at least my laundry.


Friday, 12 September 2014

August Cards

Wow, August was CRAZY!  I can't believe that I was actually able to keep up with this goal.  Sheesh!  

Here are the cards that kept me busy last month:


 This card was made for The Box of Sunshine I sent to one of my sisters.  You can read more about what went into that box here.


What do you do when your best friend has an adorable baby boy?  Why make her a card, of course!  I am so happy for her.  I wish that I could be there to kiss his little cheeks, but being in different states makes that kind of hard.  I guess a card will have to do.


Simple.  Edgy.  Birthday.  The End.


My husband's family wasn't able to get together to celebrate Father's Day until this month (yes, Father's Day was two months ago.)  So we made a big party out of it and celebrated his dad's birthday too!!


 I made this one for my wonderful mom.  She is addicted to everything purple, so that had to be included.  I love the rounded corners on this one.


 My husband and I celebrated our 6th wedding anniversary last month.  Best 6 years of my life!
We are members of The Church of Jesus Christ of Latter-Day Saints (Mormons), and we believe that marriage can be beyond "till death do you part."  I'd love to answer any questions you have about Mormon Temples and what we believe.  Or you can find more info here.


 Do you remember Homestar Runner?  My little brother and I use to love it!  We have this long running joke about one of the episodes.  If you want to be in on the joke, you can watch the short 4 minute episode here.  I probably think it's funnier then it really is... let me know what you think.


 A perfect card for my pirate loving nephew!  This card was fun to make because I was able to play with fire!  I slightly burned the edges of the paper to give it a fun and unique look.


 I love the simplicity of this card!  You don't need a lot of crazy cutouts and stamps to make a special card.  All you need is a few scraps of paper, and some letter stickers.  Easy!


Here is another simple thank you card.  My blade on my cutter is starting to dull, so I wasn't able to get the clean cut I wanted, but you use what you got, right?


Phew!  We made it!  Now on to September.


Monday, 8 September 2014

Box of Sunshine

It's raining here in Arizona today.  Which doesn't happen all that often, but when it does, watch out!  When it rains, it pours!  The monsoon season is one of my favorite things about Arizona.  Seriously, the lightning storms are incredible!!  We got so much rain last night that streets have literally turned into rivers, most major freeways are shut down, and they canceled school!  I've heard, it is the worst storm Arizona has ever gotten!  

So, on such a dark and dreary day, I wanted to share with you a little bit of sunshine.  This is a little thing I put together for my sister, who was going through a difficult time, and I thought she could use a little pick-me-up.  I call it my little Box of Sunshine.


This is seriously one of the easiest gifts to put together!  And I had a blast doing it, too!  Everywhere I went I would look out for things that were yellow that I could put into the box.  That's right, everything in the box was yellow, and only yellow.  Plus, I painted the inside yellow too, so when you open the box: BAM!!! all you see is yellow.  All you see is sunshine!


I used a pretty small box, so I wasn't able to fit a ton of stuff.  Here is what I included:


Honestly, I could have probably have sent a box four times bigger, and I wouldn't have had a problem finding yellow stuff to fill it.  Here are some more ideas to fill your own Box of Sunshine:

-  Wheat Thins
-  Teddy Grahams
-  Golden Oreos
-  Starbursts
-  Tissues
-  Juicy Fruit Gum
-  Finger Nail Polish
-  Potato Chips
-  M&M's
-  Yellow Loofah
-  Wet Wipes
-  Sticky Notes
-  Note pad/journal
-  Lemonade (or my favorite: Glaceau's vitamin water zero.  Delish!)
-  Lotion
-  Air Freshener
-  Soap
-  Lemon Heads
-  Crayons
-  Carmex
-  Car Air Fresheners
-  Subway Gift Card

I could go on for a while!  You'd be surprised at how many yellow things there are.


And, keeping up with my New Years resolution, I made a card to include in the box.


 Putting together this box made me so ridiculously happy!  It's amazing what happens when you look outside yourself and help others.  


Friday, 22 August 2014

Curtain Rod Photo Display

Have you ever had a project that never. seems. to. end!  I have been updating our bedroom decor for what feels like centuries.  It all started with a beautiful quilt that my sister made for me and my husband as a wedding present.  It had been sitting in a closet for years, and I really wanted to showcase it!  Unfortunately, nothing in my existing decor matched, so I had to start from square one.  It's been fun, but I am so happy to be getting to the end!  It's taken me so long to finish everything that I am probably going to want to switch things up again soon.  Ha!  Life and where you live it is a constant project.


This is actually one of my favorite projects that I have completed for our bedroom, and by far the cheapest.  All of the supplies that I used I found around our house.  I am a big believer in shopping for supplies from your own home.  We all have so many things lying around that we could transform into something useful.  All it takes is a little creativity!


This frame was originally one of those frames that has the multiple picture windows in the mat border.  I took out the mat and replaced it with some foam board  and mod podged some scrapbook paper onto it.  I am not fancy enough to have a Silhouette, or similar cutting machine, so each of these letters were cut out by hand!  Just using my boring old printer, and my trusty scissors.  It took some serious patience cutting each word out, but when you are too cheep to buy stickers... you gotta figure out another way.  I am such a cheap-o!


 These curtain rods were just lying around our house collecting dust, and my husband likes to "de-clutter" our house occasionally weekly.  So, it was either use them, or they were getting booted to the curb.  In the same box as the curtain rod, there were also some cheap plastic frames that were screaming to be used.  By simply attaching the frames to the curtain rod with a little ribbon, the drap-boring-old-rod was transformed into an incredible photo display!


I love it!  And it looks amazing above our beautiful quilt!  


Have you completed a project by using only supplies found at your own home?  Send me your photos!  I'd love to see some awesome creativity in action.

Thanks for stopping by!


Friday, 25 July 2014

Disney Couples

Next month my husband and I celebrate our sixth anniversary!  Depending on where you are in your own relationship, you may think that I am still a baby learning the ropes, or a seasoned pro.  Honestly, there are some times that I feel like both (when are you officially not considered a "newly wed" anyway?)  All I know is that I am still head-over-heals in-love with my husband, and that's enough for me.  

Ok, enough with the gushy "newly wed" talk...

Last year we celebrated our anniversary at Disneyland!  That place is truly one of "The Happiest Places on Earth."  I'm a such a kid at heart!  

I created this printable to help us remember how wonderful our time at Disneyland was (as if anyone needs a reminder about how awesome that place is.)  Have I told you how much I love Disneyland yet?


I really believe that everyone's love story is as special and magical as any fairy tale.  So, your name definitely belongs beside all of these Disney couples too!


Do you love this lamp as much as I do?
I followed this tutorial when I made it.  Such an easy DIY project!

Thanks for stopping by!

You can purchase your personalized Disney couples printable here at Puddle Design on Etsy.


Saturday, 5 July 2014

30th Birthday Celebration

The hubs just recently turned the big 3-0!!  I can't believe it!  Sometimes I still feel like we should still be in high school, but then I actually see high school kids, and I realize how incredibly loud and obnoxious many of them are.  Was I ever like that?  Maybe I am getting old...

With this being such a big birthday, I decided it would be fun to throw him a surprise birthday party.  I secretly love planning parties, so I figured this one would be no big deal.  Oh, boy was I wrong!  Throwing a surprise party for someone that you tell everything to, and spend all of your spare time with, is tough!!!  Geeze!  I had no idea what I got myself into.

Lucky for me, my parents were in town that same week, so they were able to babysit, or help decorate, or let me use their car, etc.  I wouldn't have been able to pull it off if they hadn't have been in town!  Thanks mom and dad for visiting!  The timing couldn't have been better!

I could go into detail about how I was able to keep everything a secret, and all the running around I did the day of the party (stress!!!), but I won't bore you with the details.  So, here are some pictures of the festivities instead :-).  Maybe they can help inspire you for your party planning!

Happy 30th Birthday!!


There were three tables set up, and on each of them was a vase full of one of my husband's favorite candies (Reeses, Kisses, and Peanut Butter M & M's -- he's kinda a chocolate guy).


In addition, there was a picture frame with a photo from his growing up years, and a 1984 random trivia sheet that I put together.  Did you know that in 1984 (the year he was born) the fastest street legal car was only tested at 144mph?  And that the cost of a postage stamp was $0.20?  Random... 


I had this awesome idea to have an original Nintendo set up on one side of the gym, and a current game system set up on the other, but the hubs showed up to the party almost an hour later then expected (a lot of hair pulling was happening on my part while we waited...), so we didn't really have time to play many games.  But it was a good idea, right?


We also had giant Jenga, just because it's fun.  I mean look at that!  How can you not have fun while you play!? 


This was one of my favorite decorations.  I would have wanted to put more pictures up to make the numbers thicker, but we didn't have time (that's a whole story in and of itself.  Lot's of things didn't go as planned.  Have I mentioned that I was super stressed the day of the party...?)

And of course we had to have the hub's favorite food group: PIZZA!


The diabetic coma inducing-peanut butter-chocolate-cake that I made for dessert.  This thing was ridiculously delicious, but also ridiculously rich!  You needed a gallon of milk with each bite.  My peanut butter and chocolate loving husband sure loved it though!
(For the cake, I followed this recipe from the amazing blog Kevin & Amanda.  It's seriously one of the best blogs!  You should check it out.)

I also made a Boston Cream Pie from scratch, but it wasn't even worth taking a picture of... I probably will never make another Boston Cream Pie again.  Just sayin'.  


See what I mean by rich?!  That's a chocolate cake, with chocolate chips inside the cake.  Then topped with a peanut butter butter cream frosting, all covered in Reese's Peanut Butter cups.  Phew!  You can almost get diabetes just looking at the picture!


Yeah, trying to plan and execute this was pretty stressful at times, but seeing the smile on the hub's face when he walked into the room full of his family and friends made it all worth it!  He is the most amazing husband (and 30 year old!), and I only wish that I could have done more!

Happy Birthday, babe!  I love you!!


Need a special invite for your party?  Check out Puddle Design on Etsy!

Related Posts Plugin for WordPress, Blogger...